
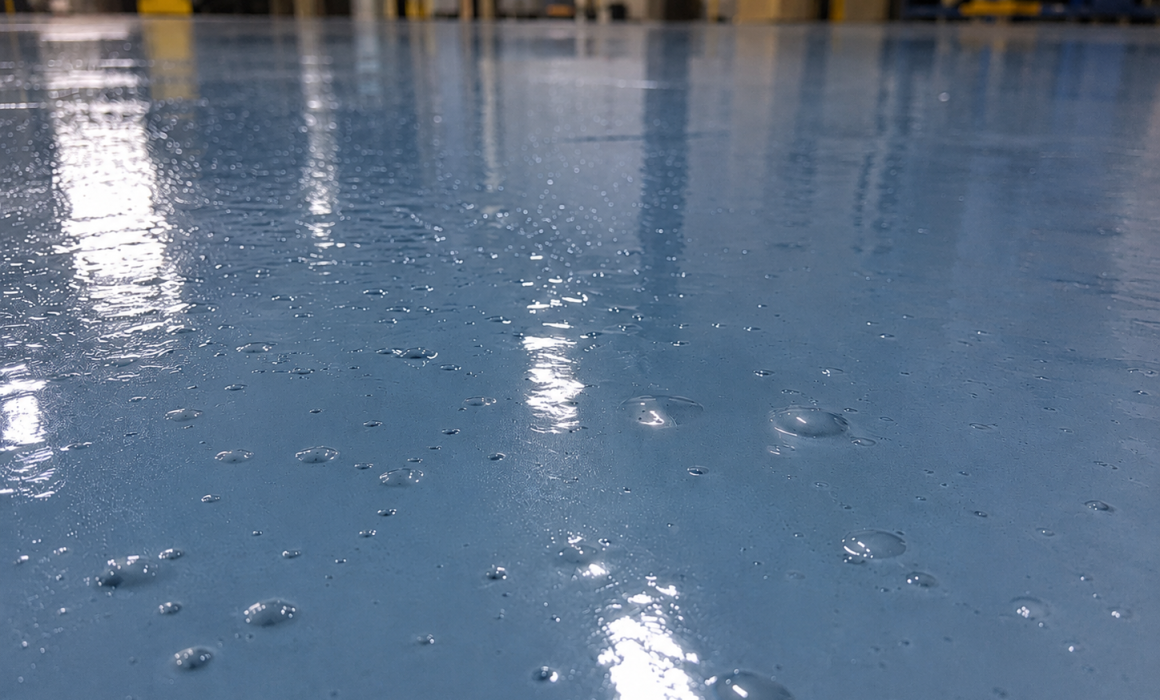
Why Epoxy Floors Bubble and How Contractors Can Prevent It
The floor looked perfect an hour ago. Now there’s a scatter of bubbles rising through the finish coat, and the question on everyone’s mind is the same one: is this a callback waiting to happen?
It might be. The difference comes down to figuring out what you’re actually looking at, and fast.
Some defects appear while the primer is being applied. Others develop during the finish coat or become visible only after the coating cures. They may look like raised bubbles, tiny pinholes, circular craters, or larger blisters.
Although these defects can look similar, they do not always have the same cause, and treating them as if they do is how a five-minute fix turns into a full recoat.
Concrete outgassing is one of the most common explanations, but bubbles can also result from aggressive mixing, a dry roller, temperature changes, moisture, excessive air movement, contamination, or application outside the product’s recommended conditions.
The sooner a contractor identifies what is happening, the better the chance of correcting it before the final coat is installed.
Quick Answer: Why Epoxy Floors Bubble?
Epoxy floor bubbles most commonly form when air or vapor moves out of the concrete and becomes trapped in the wet coating. This is known as outgassing.
Bubbles may also be caused by:
- Whipping air into the material during mixing
- Applying epoxy with a dry or poorly saturated roller
- Applying material while the concrete temperature is rising
- Significant differences between material and slab temperatures
- Excessive airflow across the wet coating
- Moisture vapor moving through the slab
- Applying in direct sunlight
- Oil, silicone, grease or other surface contamination
- Applying the coating too thin or overworking it
- Using material outside its recommended pot life or application conditions
Before choosing a repair, determine whether you are looking at a bubble, pinhole, crater, blister or fisheye.
Are They Bubbles, Pinholes, Blisters or Fisheyes?
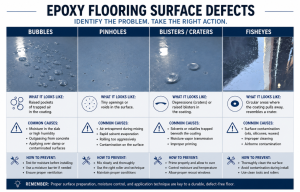
Contractors and customers often use the word “bubble” for almost every circular defect in a coating. Correct identification provides a better starting point for troubleshooting. Raised and intact: likely a bubble. Small round holes scattered across the surface: likely pinholes from outgassing. Coating pulled back from a spot instead of covering it: likely a fisheye caused by contamination, not air. Large raised areas that appear after cure require investigation for moisture, liquid intrusion or loss of adhesion likely blisters.
Bubble
A bubble is a raised pocket of air or gas trapped within or directly beneath the coating. It may remain intact or break open as the epoxy cures.
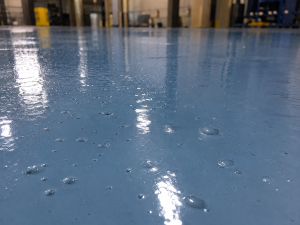
Raised bubbles are pockets of air or gas trapped within or directly beneath the epoxy coating.
Pinhole
A pinhole is a small opening left behind when air escapes through the coating. Pinholes are often associated with concrete outgassing and may appear as tiny round holes scattered across part or all of the floor.
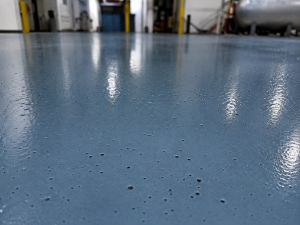
Pinholes are small openings left when air escapes through the wet coating, often because of concrete outgassing.
Craters and Blisters
Craters and blisters are rounded defects, but they have opposite profiles and may indicate different problems. A crater is a circular depression that can form when a bubble rises and breaks after the epoxy has begun to thicken. The coating may no longer have enough flow to close the opening.
A blister is a raised area, generally larger than a surface bubble, that may indicate pressure, moisture vapor or liquid beneath the coating. Blisters that appear after the floor has cured or been placed in service should be investigated for moisture, liquid intrusion or loss of adhesion.
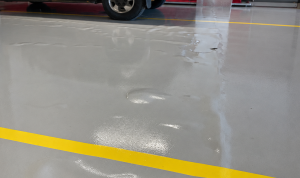
Large raised blisters may indicate pressure, moisture vapor, liquid intrusion or loss of adhesion beneath the coating
Fisheye
A fisheye is a round or irregular area where the coating pulls away from the surface rather than wetting it uniformly. Fisheyes are commonly associated with surface-tension problems caused by oil, grease, silicone, wax or incompatible residues. They should not automatically be diagnosed as outgassing.
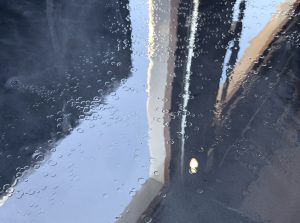
Fisheyes form when contamination or surface-tension problems cause the coating to pull away rather than wet the surface uniformly.
Common Causes of Bubbles in Epoxy Flooring
Concrete Outgassing
If you only remember one cause from this list, make it this one — outgassing is behind more epoxy bubbling problems than everything else on this page combined. Concrete is porous and contains small voids that can hold air. As the slab warms, air within those pores expands and moves toward the surface. If a wet primer or coating is placed over the concrete at the same time, the escaping air can pass through the material and create bubbles, pinholes or craters.
Outgassing is especially likely when the slab temperature is rising, direct sunlight begins warming the floor, interior heat is turned on during application, warm air enters a previously cool space, the concrete is unusually porous, or surface preparation exposes additional pores and voids.
How contractors can prevent it:
- Whenever possible, apply the primer while the slab temperature is stable or falling rather than rapidly rising.
- Use the properly selected primer to help penetrate and seal the concrete before body or finish coats are installed.
- Watch the primer closely during application and correct bubbling before proceeding.
- Do not assume a finish coat will automatically hide active pinholes in the primer.
Related resource: Thermal-Chem Product Data Sheets
Too Much Air Introduced During Mixing
You mixed it exactly like you always do — so why is this batch suddenly full of bubbles? Two-component epoxy products must be mixed thoroughly enough to combine the resin and hardener. However, mixing at excessive speed, using the wrong blade or moving the blade in and out of the material can pull unnecessary air into the mixture.
That entrained air may remain visible as bubbles after the coating is applied.
How contractors can prevent it:
- Follow the product technical data sheet for mixing time and procedure.
- Use the recommended mixing blade and keep the mixing head below the material surface.
- Avoid pumping the blade vertically through the mixture.
- Use a controlled mixing speed and do not add unapproved solvents or reducers.
Related resource: How to Apply Epoxy Flooring
Starting With a Dry Roller
Notice the bubbles trailing right behind your roller instead of scattered randomly across the floor? That’s the tell. A dry roller cover contains air within the nap, and when the roller first contacts the coating, that air may be released into the material.
Dry rolling also becomes more likely when the applicator tries to stretch the coating too far or continues rolling after the roller has stopped carrying enough material.
How contractors can prevent it:
- Pre-saturate the roller in the mixed material.
- Keep a wet edge and a properly loaded roller.
- Avoid excessive downward pressure.
- Apply the coating at the manufacturer’s specified coverage rate.
Rising Slab Temperature
The thermostat says 68°F and steady. The slab doesn’t know that. Ambient air temperature and concrete temperature are not always the same — a room can feel comfortable while the slab is still warming from sunlight, heaters, process equipment or changing outdoor conditions.
As the concrete temperature rises, air in the slab expands and increases the potential for outgassing.
How contractors can prevent it:
- Record ambient air temperature, concrete surface temperature, material temperature, relative humidity and dew point.
- Do not rely on one reading taken when the crew arrives.
- Plan the coating window around the slab, not simply around the clock.
Material and Substrate Temperature Differences
That epoxy sat in a cold truck overnight, and it’s going to behave differently because of it. Material stored in a cold truck, hot warehouse or uncontrolled jobsite may not match properly conditioned material — cold material can be thicker and harder to spread, while hot material may react more quickly and leave less working time.
Large temperature differences between the coating and concrete can affect flow, wetting, air release and cure.
How contractors can prevent it:
- Store materials within the manufacturer’s recommended temperature range.
- Allow sufficient time for material to acclimate.
- Protect containers from direct sunlight.
- Check material and concrete temperatures before mixing.
Excessive Air Movement
A box fan aimed at a curing floor feels like a good idea. It usually isn’t. Fans, temporary HVAC systems, open overhead doors, and portable heaters can all change conditions at the coating surface.
Strong airflow may accelerate surface drying, disturb the wet film, move dust or contaminants across the floor and create uneven curing conditions.
How contractors can prevent it:
- Avoid directing fans at the wet floor.
- Do not place portable heaters where they create hot spots.
- Minimize open-door drafts.
- Coordinate HVAC operation and keep dust-producing work away from the coating area.
Moisture Vapor or Liquid in the Slab
This is the cause that shows up late — sometimes weeks after you’ve packed up and left the job. Not every raised defect is a simple air bubble: moisture moving through concrete can contribute to blistering, pinholes, loss of adhesion, and other coating failures.
The risk may be greater in slabs without an effective vapor retarder, on below-grade concrete, around wet process areas or where exterior water is entering the slab. Moisture-related defects may not become visible until after the coating has cured.
How contractors can prevent it:
- Review the slab’s age, construction, and service history.
- Test the concrete using the methods required by the flooring specification.
- Follow the coating manufacturer’s moisture limits.
- Investigate active leaks and use an appropriate moisture-mitigation system when required.
Related resource: Moisture Mitigation for Concrete Floor Coatings
Contamination and Surface-Tension Problems
This is the cause contractors incorrectly identify most often because it doesn’t look like moisture or trapped air at all — it looks like the coating simply doesn’t want to stick. Oil, grease, silicone, wax, tire-treatment products, maintenance chemicals and residues from previous operations can prevent the coating from wetting the surface properly.
The resulting defect may be described as a bubble, but contamination more commonly produces fisheyes, crawling or areas where the coating pulls away. Grinding or shot blasting does not automatically remove contamination that has penetrated the concrete.
How contractors can prevent it:
- Investigate how the floor has been used and maintained.
- Degrease appropriately before mechanical preparation.
- Inspect corners, joints, drains and equipment areas.
- Perform adhesion or test-patch work when conditions are uncertain.
Quick Reference: When Did the Bubbles Appear?
The causes above show up differently depending on when bubbling is spotted. Use this as a fast diagnostic starting point, then check the matching cause above for prevention steps.
| Stage | Most likely causes | First move |
| During primer application | Active outgassing, porous concrete, rising slab temperature, aggressive rolling | Stop and evaluate before the next coat; consider a spiked roller only if the manufacturer allows it |
| During the body or finish coat | Unsealed pinholes from priming, air from mixing, dry rolling, thin application, contamination between coats | Check the primer and prior coat — finish-coat bubbles are often symptoms of an earlier defect |
| After the coating has cured | Moisture vapor, liquid intrusion, loss of adhesion, contamination, incompatible layers | Treat as a bigger investigation — delayed blistering needs more than a spot repair |
Will Bubbles Cause an Epoxy Floor to Fail?
Not necessarily. A few isolated surface bubbles or pinholes may be primarily cosmetic. However, widespread defects, open pinholes, larger blisters or areas with poor adhesion can affect sanitation, cleanability, chemical resistance and long-term system performance.
Open pinholes can be especially important in food and beverage facilities, pharmaceutical environments, laboratories, healthcare facilities, washdown areas, secondary containment and chemical-processing areas.
The correct response depends on the type of defect, how widespread it is, whether the coating remains bonded, the floor’s service environment, and whether the system must remain pinhole-free or waterproof.
How to Fix Bubbles in an Epoxy Floor
If Bubbles Are Found in the Wet Primer
- Stop and identify whether outgassing is active.
- Confirm current slab and ambient conditions.
- Address the bubbles using a manufacturer-approved application method.
- Allow the primer to cure as directed.
- Inspect for open pinholes.
- Sand, fill, or reprime affected areas when necessary.
- Do not install the next coat until the substrate has been adequately sealed.
If Pinholes Remain After the Primer Cures
- Mark the affected areas.
- Sand or abrade as required.
- Vacuum and clean the surface.
- Fill persistent voids with an approved patching or thixotropic material.
- Reprime where necessary.
- Verify that the pinholes have been sealed before continuing.
If Bubbles Are Found in the Finish Coat
- Allow the coating to reach the condition required for repair.
- Sand or mechanically abrade the affected area.
- Remove all dust and contamination.
- Fill deeper craters or voids with a compatible repair material.
- Reapply the appropriate coating within the manufacturer’s requirements.
- Recoat the full area when spot repairs would create unacceptable differences in color, gloss or texture.
If Large Blisters Appear After Cure
- Do not simply puncture the blister and apply more epoxy.
- Determine whether liquid or vapor is present.
- Check whether the coating has lost adhesion and whether the failure extends beyond the visible blister.
- Investigate contamination, moisture levels, and the condition of the existing coating or substrate.
- Correct the underlying moisture, adhesion or contamination problem before recoating.
Common Mistakes That Make Bubbling Worse
Assuming Every Bubble Is Moisture
Moisture is important, but outgassing, mixing, and application technique can produce similar-looking defects.
Assuming Every Circular Defect Is Outgassing
Fisheyes caused by contamination can be mistaken for bubbles. The repair will fail if the underlying contaminant remains.
Applying Another Coat Without Sealing Pinholes
Open pinholes can continue through subsequent coats, especially when the source is active, or the primer did not adequately seal the concrete.
Trying to Stretch the Coverage Rate
Applying the coating too thin can reduce its ability to flow and level. It can also lead to dry rolling and excessive manipulation.
Using Heat to Speed the Cure
Uncontrolled heat can warm the slab, shorten working time, and increase outgassing.
Ignoring the Recoat Window
A missed recoat window may require mechanical abrasion. Applying over a cured surface without the required preparation can create adhesion problems.
Treating a Technical Data Sheet as Optional
Mixing time, coverage, temperature limits, recoat windows, and application procedures are part of the system design.
Frequently Asked Questions
Why did my epoxy floor bubble while I was rolling it?
Bubbles that appear during rolling may be caused by concrete outgassing, a dry roller, excessive roller pressure, air introduced during mixing or a rising slab temperature. Check whether the bubbles originate from specific points in the concrete or appear uniformly throughout the mixed coating.
Why did bubbles appear after the epoxy cured?
Bubbles or blisters appearing after cure may indicate trapped air, moisture vapor, liquid water, contamination, or loss of adhesion. Larger or delayed blisters should be opened and investigated before a repair system is selected.
Can I put another coat of epoxy over bubbles?
Not until the cause has been identified and the defects have been repaired. Applying another coat over open pinholes, contamination or moisture-related blisters may reproduce or temporarily hide the problem.
Can a heat gun or torch remove bubbles from an epoxy floor?
Do not use a torch, heat gun, or similar method unless the coating manufacturer specifically approves the procedure. Added heat can shorten working time, damage the coating, create a fire or exposure hazard, and increase outgassing from the slab.
Does a spiked roller remove bubbles from epoxy?
An appropriate spiked or porcupine roller may help release bubbles in certain wet primers or high-build coatings, but it is not correct for every product or every stage of cure. Follow the manufacturer’s application instructions.
Does moisture cause bubbles in epoxy floors?
It can. Moisture vapor or liquid beneath the coating may contribute to blistering, pinholes, loss of adhesion or other failures. Concrete should be evaluated and tested according to the flooring specification and product requirements.
What is concrete outgassing?
Concrete outgassing is the movement of air or vapor from pores and voids in the slab toward the surface. When a wet coating is present, that escaping air can create bubbles, pinholes or craters.
Are pinholes in an epoxy floor a problem?
A few isolated pinholes may be cosmetic, but open or widespread pinholes can affect sanitation, cleanability, waterproofing and chemical protection. Their significance depends on the floor’s intended service.
Can epoxy bubbles be repaired without recoating the entire floor?
Small isolated areas may sometimes be sanded, filled, and recoated. A full recoat may be necessary when defects are widespread or when spot repairs would produce visible differences in gloss, color, or texture.
How do I keep epoxy from bubbling?
Evaluate the slab, moisture test when required, control material and concrete temperatures, apply while the slab is stable or cooling, use the recommended primer, mix without entraining excessive air, keep rollers properly saturated, and repair pinholes before applying finish coats.
Stop the Problem Before the Finish Coat
Here’s the good news: most epoxy-floor bubbling problems are far easier to correct during priming than after the final coat has cured. Catch it early, and it’s a five-minute fix. Catch it late, and it’s a recoat.
The best prevention strategy is not a single roller or a universal application trick. It is a controlled installation process that accounts for the concrete, the environment, the product, and the way the material is mixed and applied.
Before beginning the project, review the substrate, confirm moisture and environmental conditions, read the technical data sheets, use the specified primer and system components, watch the primer closely, and correct defects before moving forward.
When jobsite conditions are unusual, ask before applying the material.
Need Help Troubleshooting an Epoxy Flooring Project?
Not sure what you’re looking at, or how to fix it before the next coat goes on? The Thermal-Chem technical team works directly with contractors to sort through substrate conditions, product selection, and jobsite surprises like these.
| Download the free Epoxy Floor Bubble Troubleshooting Checklist
A one-page, jobsite-ready PDF to record defect type, timing, temperatures, mixing details, and next steps before you call for support. |